OLED Display
OLED Display Usage
Description
Near the center of the face of the Cuica there is a small grayscale OLED display. This display shows basic information such as the state of the Cuica, the Wi-Fi signal strength, etc., but most importantly, it's used to configure the Wi-Fi connection.
Factory Reset
The factory reset button is used to both reset the Wi-Fi and to also clear all the user data from the device and return it to a factory default state. These operations may also be done from the web interface of the Cuica.
To factory reset the device or reset the Wi-Fi using the reset button, insert a paper clip into the tiny hole between the USB port and the 20-pin interface on the front of the Cuica. Press the button until the factory reset screens appear. The longer the button is held down, the more complete the factory reset will be:
- 5 seconds: Reset the Wi-Fi connection, enabling the Access Point on reboot
- 10 seconds: Soft reset the Cuica: clear Binary Images, Test Scripts, etc.
- 15 seconds: Hard reset the Cuica: clear everything and reformat storage
As the reset levels progress, the display shows the reset level that will be applied if the button is released.
Initial Wi-Fi Configuration
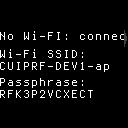
Wi-Fi settings can be configured in the web interface. However, without a network connection, these settings cannot be accessed initially. When the Cuica starts, it attempts to connect using the existing Wi-Fi connection settings and after a timeout, automatically enables the Wireless Access Point (AP). This allows a direct connection from a Wi-Fi client such as a phone, tablet, or PC.
The access point is enabled with a randomly generated passphrase that changes each
time the AP starts. The SSID is set to <Cuica Serial Number>-ap. When the AP is
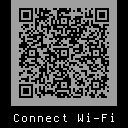
ready for a client to connect, the following two screens alternate, the first for
manual entry on PC or mobile clients or the second for mobile devices which can
read QR codes:
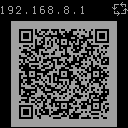
Once the device has been connected to the AP, the device will be found on
that connection at 192.168.8.1. Note that because the IP is not part of the
TLS certificate, clients must ignore TLS errors for the page to load.
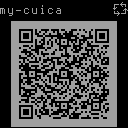
Once this connection is established and the web interface is accessible,
the user can log in using the randomized, per-unit credentials provided by the
unit. After logging in, the setup wizard will begin if the Cuica has not been
configured or if there was a hard reset leading to the AP being enabled.
If the setup wizard has already run and only the Wi-Fi has been reset,
the Wi-Fi settings are now available to be used to set up the new Wi-Fi
connection. Once set, the system will reboot and after connecting once the
HTTPS interface is running, System Ready will be displayed:
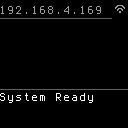
When the system has been idle for a period, the IP address, hostname, and QR code will also be shown periodically as it is shown above but with the router-assigned IP address and user-defined hostname.
